
Billing Guide
American Fidelity's billing system now generates a comparison report of your deductions against our data within minutes after you upload a formatted Excel file through your online account.
How it Works


Format
Format your Payroll Deduction File.

Upload and Compare
Upload your completed Excel file. Our system will compare the file to your bill and show any differences.

Reconcile the Bill
From there, you'll be able to reconcile the bill and make payment.

Pay the Bill
Yay! You're done!
Formatting Your Payroll Deduction File
The system requires a properly formatted payroll deduction file:
- Social Security Number
- Employee Name
- Deduction Amount
- Type of Coverage (optional but helps match records more precisely)
- Using the instructions, format your Payroll Deduction File.
Payroll Deduction File Examples
| Employee SSN | Employee Name | Deduction Amount | Type |
|---|---|---|---|
| 111111111 | Last Name, Jennifer | 32.40 | CANCR |
| 111111111 | Last Name, Jennifer | 25.00 | LIFE |
| 222222222 | Generic, Antonio | 52.76 | DISAB |
| 222222222 | Generic, Antonio | 12.20 | ACCID |
| 222222222 | Generic, Antonio | 112.00 | LIFE |
| 333333333 | Falsename, Chad | 29.34 | CRITI |
| 333333333 | Falsename, Chad | 43.20 | CANCR |
| 444444444 | Imaginary, Lee Roy | 52.76 | DISAB |
| 555555555 | Fictional, Caroline | 25.00 | LIFE |
| 555555555 | Fictional, Caroline | 12.20 | ACCID |
One Column Example
| Employee SSN* | Employee Name* | Deduction Amount* | Type (Not required) |
|---|---|---|---|
| 111111111 | Last Name, First Name | 32.40 | CANCR |
| 222-22-2222 | Last Name, First Name | $25.00 | LIFE |
Two Column Example
| Employee SSN* | Last Name** | First Name** | Deduction Amount* | Type (Not required) |
|---|---|---|---|---|
| 111111111 | Last Name | First Name | 32.40 | CANCR |
| 222-22-2222 | Last Name | First Name | $25.00 | LIFE |
Select the Bill to Pay
When you're ready to reconcile your bill, select the correct bill from the main billing screen. Each bill will have a status associated.
The following provides the meaning for each status:
Ready: This status means you can view the file and take necessary actions.
Edited: This status indicates that you have accessed the invoice and started working on discrepancies.
In Process: This status indicates that we have received your payroll deduction file or payment and are processing your invoice.

Upload Your Payroll Deduction File
After selecting the bill for reconciliation, upload your formatted payroll deduction file and select the Submit File(s) button.
Do you have 26 pay? Learn more.
Understanding Your Comparison Report
Top Descriptions:
- Billed Amount: This is the amount shown on your product invoice. It reflects the total charges billed for the coverage period.
- Payroll Amount: This is the total amount from your uploaded deduction register. It represents what has been deducted from employees’ paychecks.
- Left to Allocate: This is the total difference between your billed amount and payroll amount.
- Important: The payroll amount matches your deduction register total, as this reflects the actual deductions taken from employee paychecks. The billed amount may differ due to timing or adjustments, but the payroll amount is the accurate figure for reconciliation. As you work through the reconciliation, the “Amount Left to Allocate” will decrease as discrepancies are resolved. The goal is to bring this amount to zero, which confirms that your invoice now matches your deduction register.
Tab Descriptions:
- Show All: All comparisons are shown.
- No Payment Received: Bill reflects the amount due, but no payment was listed on the payroll deduction register that was uploaded.
- Not on Bill: Bill does not reflect an amount due, but the premium was deducted.
- Overpaid: Payroll amount is more than the billed amount.
- Underpaid: Payroll amount is less than the billed amount.
- No Action Required: Shows name changes and minor differences that don't require your review.
- Matched Records: Your data is in sync with ours/our records.
Reconciling Your Bill
Select this option if you are removing an employee from the invoice due to a leave of absence and would like us to bill the employee directly for the balance due.
Select this option if the employee is on a leave of absence but you would like them to remain on the invoice, and the employer will remit the premium on their behalf.
Select this option if a new application has been submitted.
Select this option if you are adding an employee back to an invoice after a leave of absence and would like us to bill the employee directly for the back premium due.
Select this option if you are adding an employee back to an invoice after a leave of absence and the employer will remit the back due premium on their behalf.
Scheduling Payment
After reconciling, you will have two payment options. If you aren't ready to pay, select Save for Later. If you are, choose Set Up Payment.
When paying by check, please include your Invoice Number and Customer Number. Also, please attach the invoice coupon page, which is the first page of the PDF. It contains the mailing address for your payment.


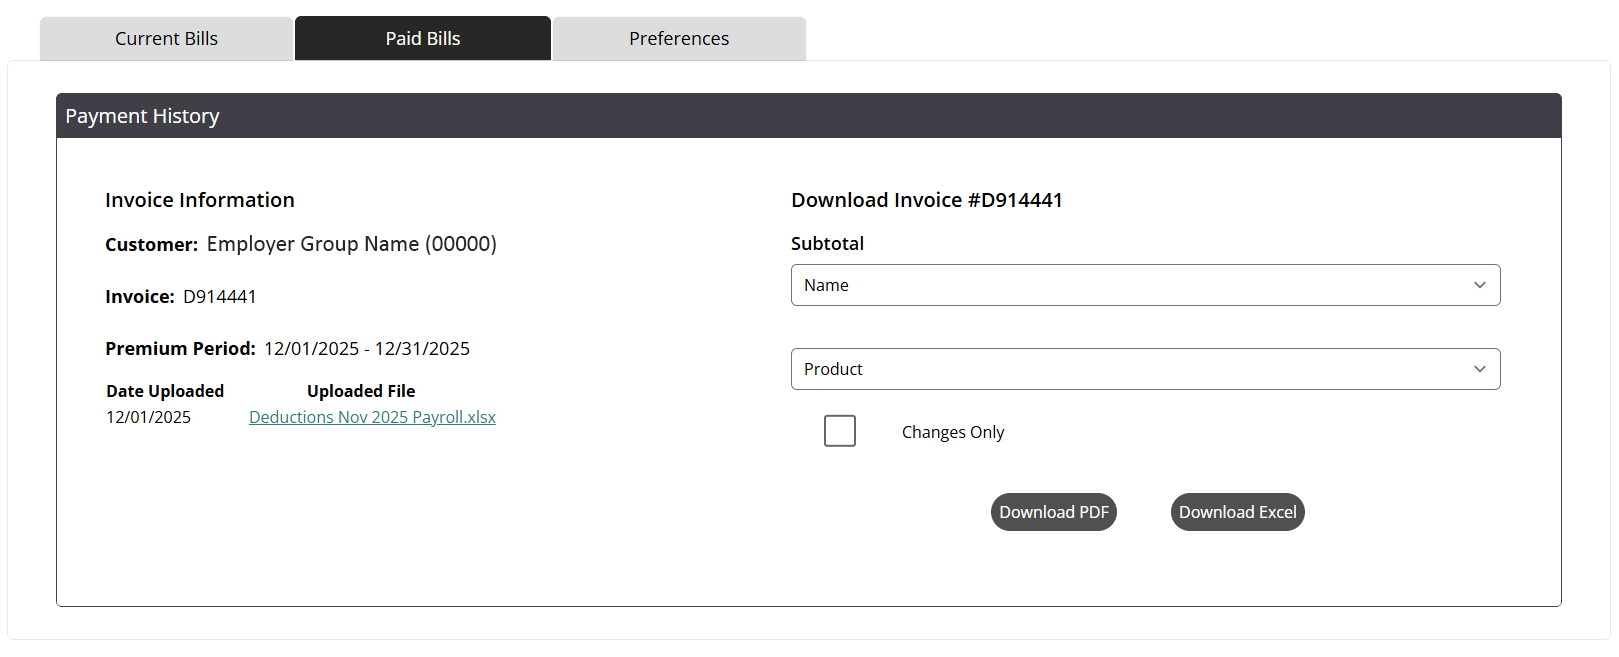
Bill Confirmation
To save your confirmation screen after submitting payment, select Print Summary. You can also access this information by clicking Invoice under Paid Bills. The invoice moves to Paid Bills after payment has been posted.
Reconciling online by check invoice example:
Paying by EFT without uploading a file invoice example:


Questions?
Contact your American Fidelity billing representative at 800-662-1113.
If you are looking for other reconciliation options, please contact your billing specialist.